
Tips for making macaron creatures:
1. Starting with good batter.
2. Planning.
3. Working fast & efficiently. Batter is time sensitive.
4. Practice, practice, practice.
PART 1: THE BATTER
Usually I don’t talk much about the work that comes before the decoration, even though it’s the most important part of creature crafting, the part that either makes or breaks the game: the batter!
Starting with good batter:
At H&B we use Italian meringue. I find Italian meringue more stable & forgiving when it comes to combining the dry & wet ingredients. I started baking macarons with French meringue. Once I learned Italian, I haven’t looked back.
A good batter starts with whipping egg whites into meringue & understanding when to stop mixing the wet & the dry. We have a few ninjas at the bakery who are trained on batter making. It’s amazing on how different each ninja whips their meringue, therefore delivering different batter consistencies.
Batter consistency:
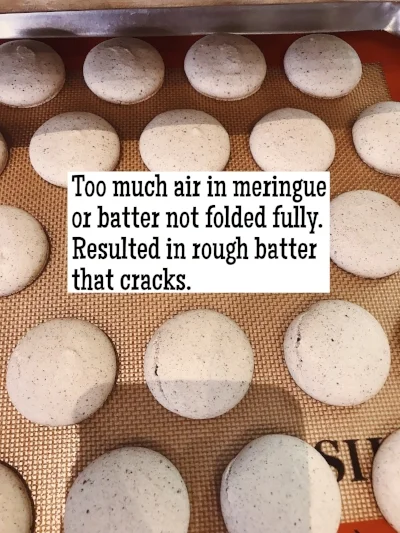
Poor batter: lumpy, grainy, dry, takes a ton of angry tapping to spread slightly, high chance of cracking once baked. This is the result of under-folded batter or too much air in meringue.
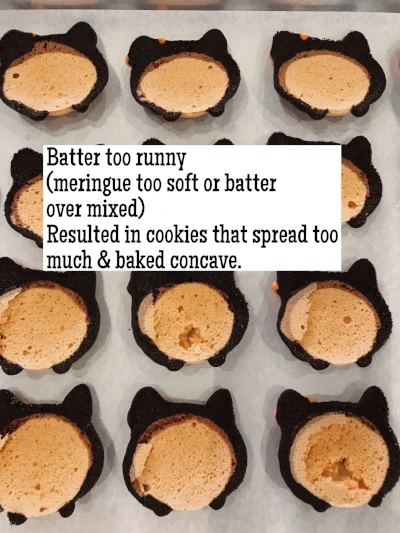
Poor batter: runny, spreads beyond control once piped, collapses once piped, bakes concave. This is the result of too soft meringue or over-folded batter.
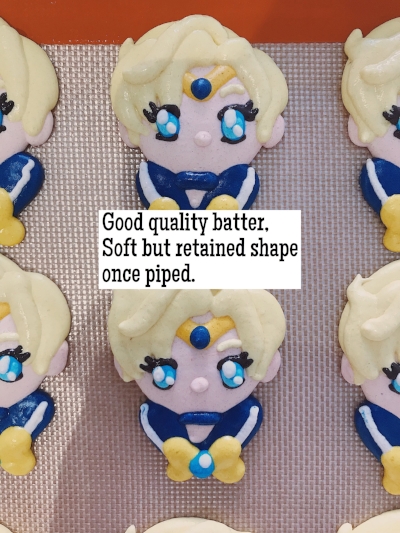
Great batter: smooth & shiny, maintains structure, bakes clean. See fourth image.
A smoother batter texture can also be achieved by increasing the sugar to almond flour ratio. However who wants to eat a super sweet cookie? At H&B we actually decreases the sugar:almond ratio as much as possible without compromising the texture & bake.
Do you wait until your batter dry before laying on another layer?
That depends! If I’m piping a creature that require a 3D effect then I wait a little (not too long that the batter dries completely). The more the batter dries, the less shiny it looks. It takes practice to determine how to long wait.
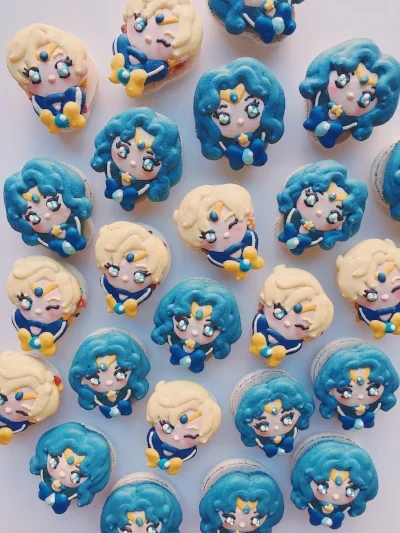
3D layering is an important technique in piping hair. To achieve the fluffy hairstyles that many anime characters possess, multiple layers of batter is piped. See fourth & fifth photo of the fluffy hair. You can see the definition of each layer of batter that’s piped on top.
If I’m trying to achieve a seamless transition from one color to another, then I pipe the colors on right away & tap the tray so the top layer sink into the bottom layer.

See photo of corgi butts and the smooth transition from the orange to white.
PART 2: PLANNING
Effective communication among your teammates is the key ingredient to success. Batter, not only it’s temperamental to make, it’s time sensitive. You can’t let batter sit there for half an hour, pipe it, & expect the macarons to bake clean.
They will not.
Old, broken down, & deflated batter (just like over mixed batter) will collapse & bake oily. Your shells will be fragile.
Not only you have to work quickly, you need to have a game plan before starting batter.
Prior to decorating a creature, I study the design. I then decide which layer will need to be piped first, second, third, & so forth.
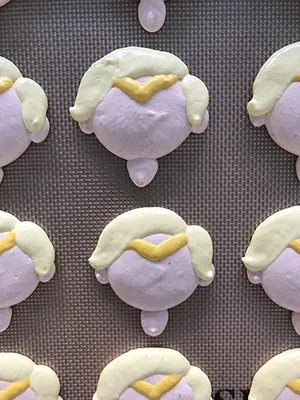
We’ll use Sailor Uranus as an example. Which layer will need to be piped first? For any humanoid, it’s the base skin. For the scouts, since I always make them with their collars & bow, they’ll need a neck too.
The skin batter will be the first one on the list to be made.
Then her tiara will be piped on top of the base because it’s much easier to lay down the tiara before the hair, rather than having to squeeze it in once the hair is already piped.
For the next layer, I usually continue with the base hair layer. Piping out the hair early on will give it a chance to slightly dry, so when I lay another layer on top it will not sink in.
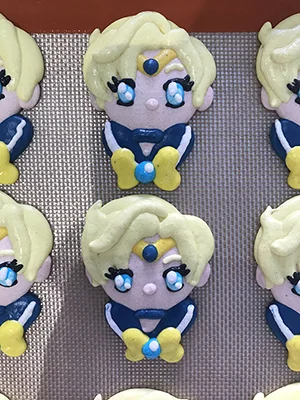
Another rule of thumb for me is to pipe out all the bigger details first. The smaller details can wait until later since THE BATTER IS BREAKING DOWN AS TIME TICKS BY. Using slightly deflated batter for a small detail won’t be as devastating as using it for a big detail.
So I decided to pipe her collar next, then eyes, then bow, & lay down the final touches for hair.
THIS IS THE BATTER LIST BREAKDOWN:
Skin x 1/4 bag (for the skin base)
(bag here refers to a big piping bag with a piping tip attached). It’s a common term we use at our bakery.
Skin x 1 (50g) (for nose & neck)
Gold x 1 (50g) (for tiara)
Gold x 1 (100g) (for bow)
Yellow (light) x 3 (100g) (for hair)
Navy x 1 (50g) (for tiara jewel)
Navy x 1 (100g) (for collar)
Blue x 1 (100g) (for bow jewel & eye)
Light blue x 1 (50g) (for eye highlight)
Black x 1 (50g) (for lashes)
White x 1 (25g) (for highlights)
Usually when I write my batter request for whomever is on batter (hopefully Pawel ^_-), it’s much more condensed (I don’t write out what each color is for), and some quantities are understood). However, it is very important to separate your colors into smaller baggies (or pouchies as we call them at the bakery) for different details even if they are the same color, so you don’t end up deflating the batter as you are piping it. The pressure & body heat that’s applied to the piping bag breaks down your batter faster!
I hope these tips have helped you on your macaron decorating journey. Remember nobody starts out as an expert. Practice practice practice! I do this for a living so I’m getting my practice everyday! That’s how I learned, by trial & error.
Good luck!